Torcetti di Saint Vincent
 |
Baker's corner facebook fanpage has reached 1000 likes.
And the blog, with more than 450 posts published in 6 years, has almost reached 1 000 000 pageviews.
These info may be boring for someone, numbers may be ridiculous for many bloggers who reach them in just one month ;), but in my little world, they are important and make me feel happy.
Happy for all the people I've "met" even if only virtually, but when you meet people with same interests they may feel closer than many people you meet really on daily basis. When you share the enthusiasm for a recipe that turned out well only someone who shares the same passion can understand your childish happines in that moment.
Happy for my views that have expanded so much in these 6 years. I started this blog in a very simple way for a very simple reason. I wanted to share my recipes in a way that my friends, who often asked for recipes, could have them on hand in any moment, explained in details and (where possible and necessary) documented with photos of not only the final result but also of different preparation steps.
No need to say, I grew up step by step with my blog. I started setting new goals for myself. I moved from everyday simple recipes to more complicated and complex ones that I almost didn't dare think of before. And even though I still like minimalism and simplicity, I like to challange myself often.
I'm grateful to the food blogging world for every new ingredient it brought into my pantry, for every new recipe people shared, and the courage I found to try my hands on things I never thought I'd be able to make.
These days (I don't remember the exact day) my sourdough starter is turning 3. And the older it's getting, the more I keep thinking about it, or better to say, what to make with it.
It's given me more satisfaction than any othere ingredient I've used in these 6 years. Probably because it's not an easy art to learn. It's challenging indeed. But it's a huge satisfaction when you bake with it. It takes time, it takes knowlegde, it takes experience, and it gives you three times more in terms of pleasure once things are baked. The sourdough starter has taught me the art of patience. Because when you bake with sourdough starter, you should forget about the clock. You know when you started preparing the dough but you rarely know when you are going to bake it. And you keep checking on it, you keep asking yourself whether it will rise or not, is it going to turn out well or not. For most people this may be the cause of despair, but for me, as I repeated a few times already, it's a part of challenge.
These past few weeks have been challenging for me in a completely different sense, however. If you follow my blog regularly, you've probably noticed I haven't published a single recipe this month. I've been very busy and tired, the family is taking up all my time and forces. I've turned into nurse, a taxi driver, a therapist and lots of other things. And the kitchen has become my refuge, in order to keep my mind sound. And I'm still here, with plenty of new recipes to share. But with my enemy number 1 always knocking at the door - LACK OF TIME, especially when it comes to sharing the recipes on blog.
Ok, enough venting. Let's move to a new recipe.
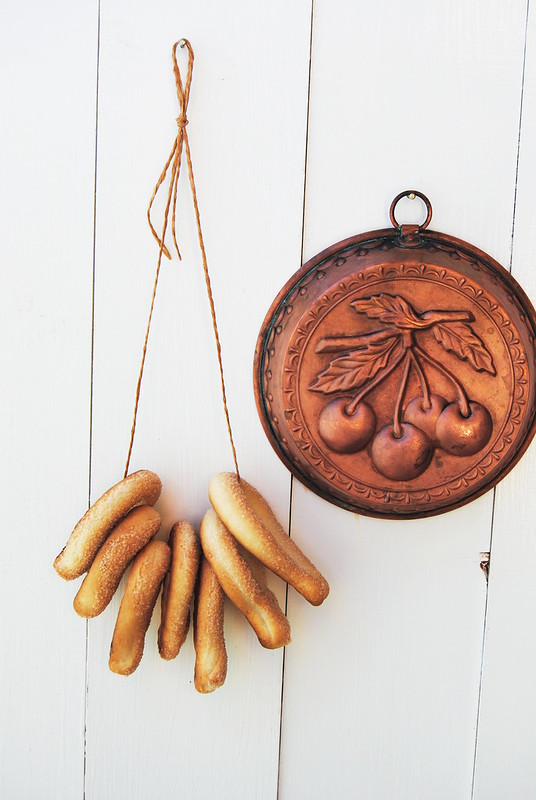
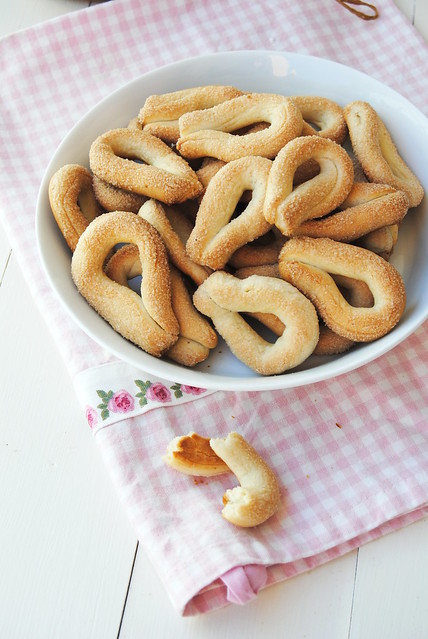
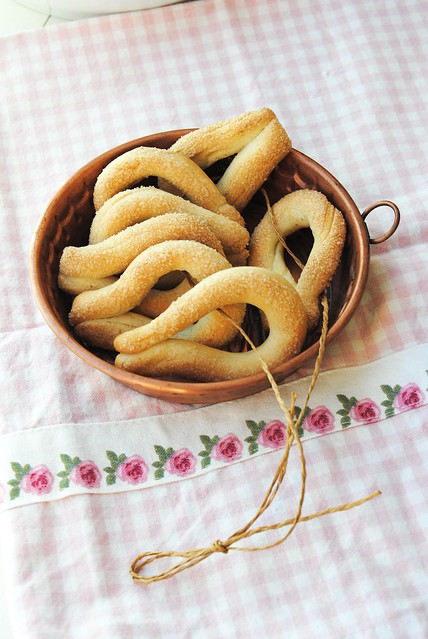
Torcetti di Saint Vincent are rustic cookies originally from Saint Vincent town in Valle d'Aosta region in Italy. Similar cookies can be found in different Italian regions, though.
These cookies are particular because made with yeast, using a dough normally without sugar (the sweetnes comes from the sugar they are dipped in after being shaped), but with good quality, flavourful butter (pay attention, please, it is very important to use good quality butter) that gives them flaky, buttery texture.
What did I change in the recipe? I couldn't resist - I added a tablespoon of sugar to the dough, it added just a hint of sweetness. I used my sourdough starter (50% hydration) instead of yeast.
These cookies are perfect in the morning or with a cup of coffee in any moment of the day.
I'm totally in love with them.
Have a beautiful weekend and remember...
All you knead is love!
Torcetti di Saint Vincent
* 120 ml water
* 200 g AP flour (+ more for kneading)
* 50 g sourdough starter (with 50% hydration) or 5 g fresh yeast
* 1 TBspoon sugar (traditionally NO sugar is added)
* a pinch of salt
* 80 g butter - softened
*+ 40 g sugar for coating

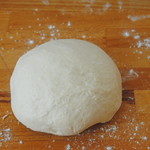
Dissolve the sourdough starter in water.
Add the sugar, flour and salt and bring everything together to form a dough. Knead the dough until smooth and elastic.
Let the dough rest covered for 1 hour or an hour and a half.
Chop the butter and let it soften at room temperature.
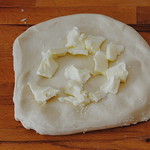
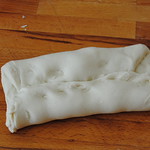
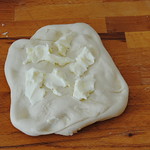
Take the dough and flatten it a little with your hands. Put 1/3 of the softened butter in the center and fold the dough over it to encase it. Flatter the dough again and add 1/3 of the butter again, close the dough and repeat once more with the remaining butter.
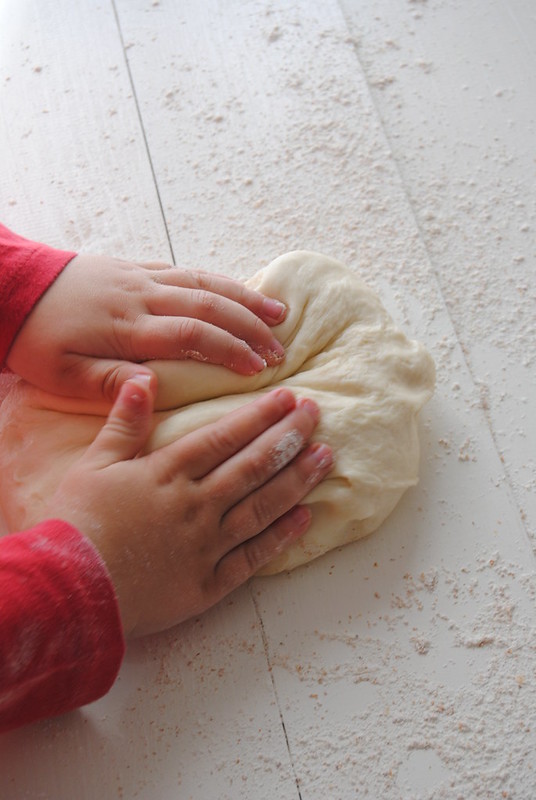
Start kneading the dough keeping the suface dusted with flour and adding a bit of flour at a time and when necessary to keep the dough from sticking too much.
It may seem like a big mass. Keep kneading until the butter has been well absorbed by the dough, and the dough is smooth, soft and elastic again, not sticky, though.
Place the dough into a bowl, seal and let rest again for 1 hour.


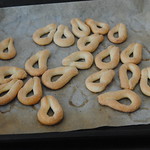
Transfer the dough to the kneading board. Flatten with your hands to form a rectangle.
Fold the uppper third towards the middle, and then the lower third over it. You will have a log in front of you.
Cut it in pieces using a pastry cutter or a knife.
Roll each piece with your hands to form tiny ropes (thick as a pencil, and about 10-15 cm long).
Join the ends creating a drop shaped cookies.
Dip each cookie in sugar, coating only on one side.
Place the cookies on a baking tray lined with baking paper, sugar coated side facing up.
Cover the tray with a clean cotton cloth and let them rest 15-20 minutes, and in the meantime heat the oven to 200°C.
Bake the cookies for about 12-15 minutes or until golden brown.
Let them cool completely before storing them in an airtight container. They keep well for weeks.
Torcetti di Saint Vincent
* 120 ml di acqua
* 200 g di farina 00 (+ altra per impastare)
* 50 g di lievito madre (con 50% di idratazione) o 5 g di lievito di birra fresco
* 1 cucchiaio di zucchero (ricetta tradizionale non prevede lo zucchero)
* un pizzico di sale
* 80 g di burro - morbido
*+ 40 g di zucchero semolato per copertura
Spezzettate e sciogliete il lievito nell'acqua.
Aggiungete lo zucchero, la farina e il sale. Impastate fino a ottenere un impasto liscio ed elastico.
Sistemate l'impasto in una ciotola e lasciatelo riposare coperto per 1 ora/1 ora e mezza.
Tagliate il burro a pezzettini e lasciatelo ammorbidire a temperatura ambiente.
Riprendete l'impasto dopo il riposo. Appiattitelo un po' con le mani e mettete al centro 1/3 del burro morbido. Rachiudete il burro nel impasto, appiattitelo di nuovo, inserite ancora 1/3 del burro, e ripetete il tutto con il burro rimanente. Lavorate adesso l'impasto, aggiungendo poco alla volta la farina necessaria (l'impasto diventerà morbido e appiccicoso, con il burro che cercherà di uscire da tutte le parti), fino a incorporare bene il burro e rendere l'impasto di nuovo liscio, morbido ed elastico, ma non appiccicoso.
Sistemate l'impasto di nuovo nella ciotola e lasciatelo riposare per 1 ora a temperatura ambiente.
Trasferite l'impasto sulla spianatoia. Appiattitelo un po' con le mani formando un rettangolo. Piegate il terzo superiore verso il centro e poi quello inferiore sopra, formando un tronchetto.
Tagliatelo a pezzettini e poi formate dei rotolini sottili come una matita e lunghi 10-15 cm.
Chiudeteli formando una specie di goccia.
Passate le ciambelline nello zucchero solo da un lato e sistematele sulla placca rivestita con la carta da forno, con il lato zuccherato rivolto verso l'alto.
Cuocetele nel forno già riscaldato a 200°C per 12-15 minuti circa o finché diventano dorate.
Lasciatele raffreddare completamente prima di sistemarle in un contenitore a chiusura ermetica.
Si conservano benissimo per diverse settimane.
Torcetti di Saint Vincent
* 120 ml vode
* 200 g brašna (+ dodatno po potrebi pri miješenju)
* 50 g kvasa (s 50%-tnom hidratacijom) ili 5 g svježeg kvasca
* 1 žlica šećera (tradicionalni recept je bez dodatka šećera)
* prstohvat soli
* 80 g maslaca - omekšalog
*+ 40 g šećera za ukras
Iskidajte kvas na komadiće i otopite ga u vodi (sobne temperature).
Dodajte šećer, brašno i sol. Mijesite tijesto dok ne postane glatko i elastično.
Stavite tijesto u zdjelu, pokrijte i ostavite da odmara 1 sat (do sat i pol).
U međuvremenu narežite maslac na komadiće i ostavite barem pola sata na sobnoj temperaturi da odmekne.
Nakon što je tijesto odmorilo premjestite ga na radnu površinu i lagano rastanjite rukama. Stavite na sredinu 1/3 mekanog maslaca i preklopite krajeve tijesta preko maslaca tako da bude potpuno zatvoren. Ponovno pritišćući rukama tijesto, rastanjite ga i stavite na sredinu još jednu trećinu maslaca, zatvorite ga tijestom i ponovite postupak i s preostalim maslacem.
Mijesite tijesto dodajući po potrebi brašno (ispod tijesta i po tijestu) jer će tijesto u početku biti ljepljivo, maslac će pokušavati "pobjeći" iz tijesta. Tijesto će na koncu prestati biti ljepljivo, i postat će ponovno meko, glatko i elastično (mogu čak reći svilenkasto mekano).
Smjestite ponovno tijesto u čistu zdjelu, pokrijte (pokolpac ili prozirna folija) i ostavite da odmara 1 sat.
Premjestite tijesto na lagano pobrašnjenu radnu površinu. Rastanjite ga rukama da dobijete pravokutnik. Preklopite gornju trećinu prema sredini i donju preko nje, tako da dobijete rolnicu.
Izrežite rolnicu na manje komadiće, i svaki komadić, valjajući ga dlanovima na dasci, oblikujte u rolnicu dužite 10-15 cm.
Spojite krajeve i oblikujte "suzice".
Umočite oblikovane kekse u šećer, ali samo s jedne strane.
Smjestite ih na pleh tako da je pošećerana strana okrenuta prema gore.
Pokrijte pleh čistom platnenom krpom dok se pećnica ne zagrije na 200°C.
Pecite ih 12-15 minuta odnosno dok nisu zlatno smeđe boje.
Ostavite ih da se ohlade, a zatim ih spremite u metalnu ili plastičnu posudu koja se zatvara hermetički.
 |
Torcetti di Saint Vincent
* 120 ml water
* 200 g AP flour (+ more for kneading)
* 50 g sourdough starter (with 50% hydration) or 5 g fresh yeast
* 1 TBspoon sugar (traditionally NO sugar is added)
* a pinch of salt
* 80 g butter - softened
*+ 40 g sugar for coating


Dissolve the sourdough starter in water.
Add the sugar, flour and salt and bring everything together to form a dough. Knead the dough until smooth and elastic.
Let the dough rest covered for 1 hour or an hour and a half.
Chop the butter and let it soften at room temperature.
Take the dough and flatten it a little with your hands. Put 1/3 of the softened butter in the center and fold the dough over it to encase it. Flatter the dough again and add 1/3 of the butter again, close the dough and repeat once more with the remaining butter.
Start kneading the dough keeping the suface dusted with flour and adding a bit of flour at a time and when necessary to keep the dough from sticking too much.
It may seem like a big mass. Keep kneading until the butter has been well absorbed by the dough, and the dough is smooth, soft and elastic again, not sticky, though.
Place the dough into a bowl, seal and let rest again for 1 hour.


Transfer the dough to the kneading board. Flatten with your hands to form a rectangle.
Fold the uppper third towards the middle, and then the lower third over it. You will have a log in front of you.
Cut it in pieces using a pastry cutter or a knife.
Roll each piece with your hands to form tiny ropes (thick as a pencil, and about 10-15 cm long).
Join the ends creating a drop shaped cookies.
Dip each cookie in sugar, coating only on one side.
Place the cookies on a baking tray lined with baking paper, sugar coated side facing up.
Cover the tray with a clean cotton cloth and let them rest 15-20 minutes, and in the meantime heat the oven to 200°C.
Bake the cookies for about 12-15 minutes or until golden brown.
Let them cool completely before storing them in an airtight container. They keep well for weeks.
 |
Torcetti di Saint Vincent
* 120 ml di acqua
* 200 g di farina 00 (+ altra per impastare)
* 50 g di lievito madre (con 50% di idratazione) o 5 g di lievito di birra fresco
* 1 cucchiaio di zucchero (ricetta tradizionale non prevede lo zucchero)
* un pizzico di sale
* 80 g di burro - morbido
*+ 40 g di zucchero semolato per copertura
Spezzettate e sciogliete il lievito nell'acqua.
Aggiungete lo zucchero, la farina e il sale. Impastate fino a ottenere un impasto liscio ed elastico.
Sistemate l'impasto in una ciotola e lasciatelo riposare coperto per 1 ora/1 ora e mezza.
Tagliate il burro a pezzettini e lasciatelo ammorbidire a temperatura ambiente.
Riprendete l'impasto dopo il riposo. Appiattitelo un po' con le mani e mettete al centro 1/3 del burro morbido. Rachiudete il burro nel impasto, appiattitelo di nuovo, inserite ancora 1/3 del burro, e ripetete il tutto con il burro rimanente. Lavorate adesso l'impasto, aggiungendo poco alla volta la farina necessaria (l'impasto diventerà morbido e appiccicoso, con il burro che cercherà di uscire da tutte le parti), fino a incorporare bene il burro e rendere l'impasto di nuovo liscio, morbido ed elastico, ma non appiccicoso.
Sistemate l'impasto di nuovo nella ciotola e lasciatelo riposare per 1 ora a temperatura ambiente.
Trasferite l'impasto sulla spianatoia. Appiattitelo un po' con le mani formando un rettangolo. Piegate il terzo superiore verso il centro e poi quello inferiore sopra, formando un tronchetto.
Tagliatelo a pezzettini e poi formate dei rotolini sottili come una matita e lunghi 10-15 cm.
Chiudeteli formando una specie di goccia.
Passate le ciambelline nello zucchero solo da un lato e sistematele sulla placca rivestita con la carta da forno, con il lato zuccherato rivolto verso l'alto.
Cuocetele nel forno già riscaldato a 200°C per 12-15 minuti circa o finché diventano dorate.
Lasciatele raffreddare completamente prima di sistemarle in un contenitore a chiusura ermetica.
Si conservano benissimo per diverse settimane.
 |
Torcetti di Saint Vincent
* 120 ml vode
* 200 g brašna (+ dodatno po potrebi pri miješenju)
* 50 g kvasa (s 50%-tnom hidratacijom) ili 5 g svježeg kvasca
* 1 žlica šećera (tradicionalni recept je bez dodatka šećera)
* prstohvat soli
* 80 g maslaca - omekšalog
*+ 40 g šećera za ukras
Iskidajte kvas na komadiće i otopite ga u vodi (sobne temperature).
Dodajte šećer, brašno i sol. Mijesite tijesto dok ne postane glatko i elastično.
Stavite tijesto u zdjelu, pokrijte i ostavite da odmara 1 sat (do sat i pol).
U međuvremenu narežite maslac na komadiće i ostavite barem pola sata na sobnoj temperaturi da odmekne.
Nakon što je tijesto odmorilo premjestite ga na radnu površinu i lagano rastanjite rukama. Stavite na sredinu 1/3 mekanog maslaca i preklopite krajeve tijesta preko maslaca tako da bude potpuno zatvoren. Ponovno pritišćući rukama tijesto, rastanjite ga i stavite na sredinu još jednu trećinu maslaca, zatvorite ga tijestom i ponovite postupak i s preostalim maslacem.
Mijesite tijesto dodajući po potrebi brašno (ispod tijesta i po tijestu) jer će tijesto u početku biti ljepljivo, maslac će pokušavati "pobjeći" iz tijesta. Tijesto će na koncu prestati biti ljepljivo, i postat će ponovno meko, glatko i elastično (mogu čak reći svilenkasto mekano).
Smjestite ponovno tijesto u čistu zdjelu, pokrijte (pokolpac ili prozirna folija) i ostavite da odmara 1 sat.
Premjestite tijesto na lagano pobrašnjenu radnu površinu. Rastanjite ga rukama da dobijete pravokutnik. Preklopite gornju trećinu prema sredini i donju preko nje, tako da dobijete rolnicu.
Izrežite rolnicu na manje komadiće, i svaki komadić, valjajući ga dlanovima na dasci, oblikujte u rolnicu dužite 10-15 cm.
Spojite krajeve i oblikujte "suzice".
Umočite oblikovane kekse u šećer, ali samo s jedne strane.
Smjestite ih na pleh tako da je pošećerana strana okrenuta prema gore.
Pokrijte pleh čistom platnenom krpom dok se pećnica ne zagrije na 200°C.
Pecite ih 12-15 minuta odnosno dok nisu zlatno smeđe boje.
Ostavite ih da se ohlade, a zatim ih spremite u metalnu ili plastičnu posudu koja se zatvara hermetički.
Keksi mogu stajati i do nekoliko tjedana.
Mi dispiace che il periodo non sia dei migliori. In effetti avevo notato che non avevi pubblicato da un po. Spero che passi presto, così avrai più tempo da dedicare alle cose che ti piacciono. Adoro le tue ricette e adoro le tue foto. Sono davvero poetiche. Non avevo mai sentito parlare di questi torcetti dolci, a prima vista avevo pensato fossero i torcetti al vino che si vedono spesso in giro. Invece avrei sbagliato.
ReplyDeletePS: quanto sono tenere quelle manine cicciottelle :-)))